Sunday, December 31, 2006

Festive New Year's Hats!

Today's Craft: Festive New Year's Hats!
Ring in the New Year with a Fun Festive Hat!
Take a piece of colored construction paper and bend it around to form a cone and tape it in place. Trim the base of the cone so that the hat will sit flat on a table. Now you are ready to decorate your hat with a kinds of patterns and designs! Add sparkles and glitter, feather, bright colors and more! Happy 2007! Enjoy Crafting!
More Hat Crafts and Online Resources

Saturday, December 30, 2006

Cool Confetti Balloons

Today's Craft: Cool Confetti Balloons
Celebrate the New Year with a Bang!
To make this festive balloons, all you need is the balloons themselves, some confetti, a small funnel or thick paper roll, and materials to decorate the outside of your confetti balloon. Select a bright balloon and using a small funnel or thick paper roll to stretch the opening of the balloon, insert sparkling confetti. Add glitter or sequins for some extra sparkle! Now blow up your balloon and decorate the outside with Happy New Year!, the year, all sorts of colors and designs, or anything you wish. When the countdown on New Year's Eve reaches Happy New Year pop your balloon and let the confetti fly! Happy 2007! Enjoy Crafting!
More New Year's Crafts & Resources


Friday, December 29, 2006

Friendly Snowman

Today's Craft : Friendly Snowman
Create a friendly snowman using craft sticks and paint.
To make this craft project, you will need 8 large craft sticks, white, black, and orange paint, a paintbrush, and glue. To begin lay out 5 craft sticks next to one another and glue two craftsticks horizontally across them to secure them together- this will be the back of your snowman. Let dry and flip over. Now glue one craftstick horizontally across the front about a third of the way down from the top- this will become the brim of your snowman's hat- use the picture as a guide. Now you are ready to paint your snowman. Paint the face white, the hat black, and then add a cute face. Let dry. Enjoy Crafting!

Thursday, December 28, 2006

Look! It's Snowing...Winter Craft

Today's Craft: Look! It's Snowing...Winter Craft
To make this project you will need white glitter or salt, glue, colored construction paper, and a brush or cotton swabs. Select a colored piece of paper for a background and cover it with a lot of glue. Brush the glue to create the snow patterns you want on your paper. Next sprinkle white glitter or salt all over the glue and paper and brush off the excess. Let it dry and hang up someplace special. Happy Winter! Enjoy Crafting!
More Winter Crafts & Resources

Wednesday, December 27, 2006

Noise Makers

Today's Craft: Noise Makers
Rattle Bang Boom! These noise makers will really catch your attention!
Take two paper plates and staple them together (all around the outside edges) with the fronts of the plates facing each other, put some dried beans or pasta inside before you close them completely and also add in a craft stick holder (tape it heavily in place. Decorate the sides of the plates with crayons, shapes, and other materials.
Happy New Year! Enjoy Crafting!

Tuesday, December 26, 2006

Fantastic Family Trees from Handprints

Today's Craft: Fantastic Family Trees from Handprints
Make a fantastic family using the handprint cut-outs of your family members.
To make this craft project you will need colored construction paper, scissors, glue, tape, a pencil or pen, crayons, your hand to trace, and your family members hands to trace To begin trace your hand on colored construction paper and cut out the print you made. Write on your hand print some things about yourself. Write your name, your age, your favorite things- anything you wish. Now ask your family members if you can trace their hands. Trace their hands on colored construction and then cut out the hand prints you trace. Next write their names and interesting things about them on their hand prints. Now take a piece of brown construction paper and cut out a short tree stump. Select a background piece of paper that is large enough to create your family tree on. Paste or tape the tree trunk to the bottom of the paper and arrange the hand print leaves above it to create a beautiful family tree. Hang up your family tree someplace special. A fun craft for Kwanzaa. Enjoy Crafting!
More Kwanzaa Crafts & Resources

Monday, December 25, 2006

All Encompassing Angels

Today's Craft: All Encompassing Angels
To make this craft project you will need white and yellow construction paper, scissors, and crayons or markers. Using the template provided below, cut out an angel shape from construction paper. Bend the base of the angel around so it forms a circle and tape it in place. Decorate your angelic friend, and add a halo and more if you wish. Enjoy Crafting!

Sunday, December 24, 2006

Trace and Color Winter Mitten Designs

Today's Craft: Trace and Color Winter Mitten Designs
Grab your mittens and create a cool picture.
To make this craft project, you will need a mitten, a background piece of paper, and markers or crayons. To begin, take your mitten, place it on your piece of paper, and trace it with a marker or crayon. Now color in your mitten shape with your markers or crayons creating a design all your own. Enjoy Crafting!


Saturday, December 23, 2006

Silly Noel Decorations & Cards

Today's Craft: Silly Noel Decorations & Cards
To make this silly seasonal craft, you will need either red and black construction paper, or red and black markers, and some white paper, scissors, and glue. To begin take a white piece of paper and hold it in half if you are making a card. Leave it unfolded if you wish to make a large noel decoration. Next either color or cut out a large black L and a large red circle and stripe. Arrange them on your background piece of paper and glue in place if you cut them out of construction paper. Let dry. Merry Christmas! Enjoy Crafting!

Thursday, December 21, 2006

'Glass' Christmas Ornaments

Today's Craft: 'Glass' Christmas Ornaments
To make this craft project you will need clear plastic lids (like the kind you get with a soda in a cup), colored tissue paper, glue, a paint brush, a piece of ribbon, water, and some scissors. To begin, make sure you lid is clean and dry. Next poke a small hole in the lid near an edge, thread a piece of ribbon through it and make a loop, so you'll be able to hang up your onrmanet when its ready. Tear or cut the tissue paper you have into small pieces. Mix together the glue and water together in a bowl or container in equal parts. Cover that your lid with your glue/water mixture- just brush it on. Take pieces of your tissue paper and stick them on the lid- overlap the shapes and colors to create new shapes and colors. Once you are finished putting tissue paper pieces on the lid, apply another coat of glue/water over your design. Let it all dry and hang it up. Merry Christmas! Enjoy Crafting!
More Christmas Ornament Crafts and Resources

Wednesday, December 20, 2006

Winter Snow Clouds

Today's Craft: Winter Snow Clouds
Create a fluffy snow cloud this winter season!
To make this craft project you will need white ribbon, heavy weight white paper, tape, glue, cotton balls, and scissors. To begin take your scissors and your heavy weight white paper and cut out a large curvy cloud shape. This will be your snow cloud. Next take your ribbon and cut strips of different lengths and tape them to the back of the cloud so they dangle below it. Now take your glue and cotton balls and add them to the ribbons to create the effect of snow falling from your cloud. Let dry and them cover your cloud with cotton as well if you like. Let dry and hang someplace special. Enjoy Crafting!
More Snow Crafts and Resources

Tuesday, December 19, 2006

Kwanzaa Yarn and Ribbon Cards

Today's Craft: Kwanzaa Yarn and Ribbon Cards
To make this holiday card you will need colored yarn or colored ribbon (red, green, black, and yellow), construction paper, scissors, and glue. Take a piece of colored construction paper and fold it in half. Draw a kinara on another piece of paper and tape or glue it to the front of the card. Cut out three pieces of red and green yarn and one piece of black yarn. Glue them onto the kinara. Next cut out little piece of yellow yarn and glue them on the card for flames. Add a wonderful holiday message inside and give your wishes to someone special. Happy Kwanzaa! Enjoy Crafting!

Monday, December 18, 2006

Super Sock Snowman

Today's Craft: Super Sock Snowman
To make this super snowman you will need a white sock, cotton balls, tissue paper, black felt, a fabric strip, ribbon, and pom poms. Take your white sock and stuff it with tissue paper up to the ankle of the sock. Roll down the top of the sock to create a hat for your snowman. Next take a fabric strip or a piece of decorative ribbon and tie it underneath the heel of the sock to make your snowman's head. Now cut eyes, a mouth, and buttons out of the black felt and a carrot nose out of orange felt and glue them on your snowman. Next add a pompom to the top of your snowman's hat. Glue it in place. Place your snowman someplace special. Enjoy Crafting!

Sunday, December 17, 2006

Hand Shadow Christmas Reindeer

Today's Craft: Hand Shadow Christmas Reindeer
Create a reindeer using your hands and some light.
To make a reindeer hand shadow you will need a light source like a flashlight or candle and a light colored wall. Put the light source on a stand and position yourself between it and the wall. To make the shadow, bend and position your fingers and hands into the shape pictured in front light before the wall. See if you can make the reindeer move. Enjoy Crafting!

Saturday, December 16, 2006

Great Holiday Gift: Beautiful Brick Bookends

Today's Craft: Beautiful Brick Bookends
These make a wonderful homemade holiday gift!
To make this craft you will need 2 bricks, felt, glue, and acrylic paint and brushes. First set up a nice work area to decorate your bricks- lay out newspaper and set up your paints. Paint a nice design, or create a figure, a snowman, buildings- whatever you wish. Remember that bricks are very porous, so you will have to put on a lot of paint. When your bricks have dried, trace the bottom of the brick on a piece of felt and cut out the felt. Glue the felt piece onto the bottom of the brick and you have the perfect gift.

Friday, December 15, 2006

Light the Menorah Hanukkah Craft

Today's Craft: Light the Menorah
Create, decorate, and 'light' your own Menorah!
To make this craft project, simply print the menorah provided below and grab your crayons or markers. Decorate the menorah with your crayons, and each night of Hanukkah add an additional candle and flame with your crayons. Happy Hannukah! Enjoy Crafting!

Thursday, December 14, 2006

Super Simple Christmas Reindeer

Today's Craft:
Super Simple Christmas Reindeer
To make this craft project you will need brown construction paper, brown pipecleaners,
tape, markers, scissors, and a piece of colorful ribbon or string. To begin take a piece of brown construction paper, roll it into a tube and tape it so it holds its shape. Next take your scissors and cut two arcs out of the bottom (one in the front and one in the back) to create your reindeer's legs- use the picture as a guide. Next take your brown pipecleaners and cut them into small pieces and twist them together to create antlers. Poke them through the top sides of your paper tube to add them to your reindeer. Now decorate your reindeer with your markers- add a shiny red nose, eyes, hooves, and more. Lastly, tie a holiday ribbon around your reindeer's neck. Merry Christmas! Enjoy Crafting!

Wednesday, December 13, 2006

Dangling Spiral Christmas Ornament

Today's Craft: Dangling Spiral Christmas Ornament
Create a dynamic spiral ornament with simple materials.
To make this craft project you will need an old colorful christmas card or a stiff piece of paper, scissors, a paper clip, and markers or crayons. To begin take your card of piece of paper and trim it into a circle shape. Next cut it into a single spiral (use your scissors and start from the outside). Be careful not to cut the spiral too thick or thin. Now decorate the spiral with your markers or crayons. Add additional decoration like glitter if you like. Let dry and use a paper clip to hang it. Merry Christmas. Enjoy Crafting!

Tuesday, December 12, 2006

Ice Skating Picture Craft

Today's Craft: Ice Skating Picture Craft
Create a great ice skating scene on a frozen over lake surrounded by snow.
To create great winter ice skating scene, you will need a couple of things. First take a piece of aluminum foil and cut out a large oval shape- this will be your iced over pond. Place this on a piece of blue background construction paper and added cotton ball snow with glue around the pond. Next cut out skaters using the templates provided, decorate them, and arrange them as you want on the pond and you will have a wonderful skating scene!

Monday, December 11, 2006

Bright Craftstick Star Ornament


Today's Craft: Bright Craftstick Star Ornament
To make this craft project you will need craft sticks, glue, and a piece of ribbon. To begin glue the craft sticks into a star shape using the picture as a guide. Let dry and then attach a piece of ribbon. Decorate with markers, crayons, glue, and glitter. Enjoy Crafting!

Sunday, December 10, 2006

Marvelous Marshmallow Snowmen

Today's Craft: Marshmallow Popcorn Snowmen
Make a yummy Holiday Season treat!
To make this craft project you will need a bag of marshmallows, popped popcorn, 1/4 cup of peanut butter, assorted candies (like chocolate chips, candy canes, gum drops, M&Ms, sprinkles) and an adult to help you. To begin have your adult melt together a bag of marhsmallows and 1/4 cup of peanut butter. When that is mixed and melted together, add enough popped popcorn, so that all the popcron is covered with your melted mixture. Now the fun part! Shape the mixture into different sized snowballs and stack them to create snowmen. Now decorate your snowmen with candies and stick in the fridge for about an hour. Have a great winter! Enjoy Crafting!
More Snowmen Crafts & Resources

Saturday, December 09, 2006

Pretty Pinecone Christmas Ornaments

Today's Craft: Pretty Pinecone Christmas Ornaments
Bring a Bit of the Outdoors indoors this Christmas!
To make these wonderful sparkling Christmas ornaments you will need pinecones, glitter, glue, a brush for the glue, fishing wire or string. Take the pinecone you have selected, dab it with glue using a brush to coat parts of the pinecone, and then sprinkle glitter over the pine cone. Shake off the excess and let the pinecone dry. Attach a piece of fishing line or string to the pinecone and hang it up. Merry Christmas! Enjoy Crafting!

Friday, December 08, 2006

Chocolate Kiss Hanukkah Dreidels

Today's Craft: Chocolate Kiss Hanukkah Dreidels
Make a yummy Hanukkah Dreidel you can eat!
To make this craft project you will need some chocolate kisses, some toothpicks or pretzel sticks, peanut butter, and some marshmallows. To begin, take your marhsmallow and spread a thin layer of peanut butter on it and press it onto the flat bottom of a chocolate kiss. Now take either a toothpick or a pretzel stick and push that through the marshmallow and into the flat bottom of the chocolate. Now you have a yummy dreidel. Happy Hanukkah! Enjoy Crafting!

Thursday, December 07, 2006

Little Snow People

Today's Craft: Little Snow People
Grab some white clay and make some cool snow people.
To make this craft project you will need some white clay and some little materials with which to decorate your little snow people. Try some tiny twigs, pieces of pipecleaners, little stones, and more- just add them to your clay snow figure. Enjoy Crafting!

Wednesday, December 06, 2006

Magnificent Menorahs

Today's Craft: Magnificent Menorahs
A Hanukkah Craft that you are sure to enjoy!
To create a magnificent menorah, cut a menorah shape out of construction paper and arrange it on a background piece of paper. Next cut out candles and flames to add to the menorah and decorate! Happy Hanukkah! Enjoy Crafting!

Tuesday, December 05, 2006

Happy Hanukkah Handprint Menorahs

Today's Craft: Handprint Menorahs
To make this craft you will need black and yellow construction paper and blue and white finger paint. Paint your palm blue and your fingers and thumbs white. Make a hand print on the black construction paper. Make sure all your fingers, including your thumb, are facing straightup. Then do the left hand, and make sure the thumbs overlap. This will create a menorah, with the overlapping thumbs being the Shamesh, and the other fingers the candle holders with candles. Next cut out candle flame shapes. Happy Hanukkah!

Monday, December 04, 2006

Super Santa Claus Puppet

Today's Craft: Super Santa Claus Puppet
Get ready for the holidays with a super Santa puppet!
To make this craft project you will need a paper bag, colored construction paper- white, black and red-, glue, scissors, cotton balls, and crayons or markers. To begin, using the templates cut out Santa's hat, beard, and clothes from your colored construction paper. Now you are ready to assemble your Santa puppet. Take your paper bag and flip it over so the bottom of the bag is facing up. This will be the face of your Santa. Glue on the hat, and clothes, and beard. Let the pieces dry and then decorate your Santa further by adding cotton balls to his hat and beard and features to his face with crayons and markers. Now you should have a beautiful paper bag puppet! Enjoy Crafting!

Sunday, December 03, 2006

Cool Snowman Hat

Today's Craft: Cool Snowman Hat
Make a snowman for your head this winter!
To make this craft project you will need cotton balls, glue, tape, scissors, large white construction paper, red crepe paper, orange and black paper, markers, and white tissue paper. To begin take a piece of white paper, bend it into a cone shape -leaving a large opening in the top, and tape it so it holds its shape. Next take your scissors and trim the bottom edges so they are smooth, level, and even. This is your basic hat. Next take some tissue paper, crumble it into a ball, cover it with another piece of tissue paper so it is smooth, and tape it. Insert the ball in the top of cone so it rests on top forming your snowman's head and glue or tape it in place. Now you are ready to decorate your snowman. Cut a length of red crepe paper and wrap it around your snowman for a scarf. Next add black construction paper eyes, buttons, and smile. Add an orange carrot nose. Let dry and wear with style. Enjoy Crafting!

Saturday, December 02, 2006

Make a Magical Latke

Today's Craft: Make a Magical Latke
Can you make and "fry" some magical latkes ?
To make this craft project you will need a paper plate, two craft sticks, tape, string, and brown colored heavier weight paper. First take the two craft sticks and tape them together to make a longer stick- this will be your frying pan handle. Attach the craft sticks to the paper plate to make a frying pan. Color, decorate, or wrap the frying pan in colored tissue paper if you wish. Next take a hole punch and poke a hole in the side of the paper plate and tie a legnth of string to it. Now take the brown paper and cut out a latke shape and punch a hole in it. Attach the string from the paper plate to the paper latke and see how many times in a row you can flip the latke into the frying pan. Happy Hannukah! Enjoy Crafting!

Friday, December 01, 2006

The 'Too Cute' Snowman

Today's Craft: The 'Too Cute' Snowman
To make this craft project you will need a white styrofoam cup, two small twigs, glue, scissors, and red, black, and orange paper or felt. To begin take your cup and flip it upside down- this will be your snowman's body. Next take your small twigs and poke them through the sides of the cup to create your snowman's arms. Now cut out a red strip for a scarf, black circles for eyes and buttons, and an orange carrot nose. Glue them on your snowman and let dry. Decorate further with your markers if you like. Enjoy Crafting!

Thursday, November 30, 2006

Homemade Handprint Gift Tags

Today's Craft: Homemade Handprint Gift Tags
The perfect additional to any gift you are giving this holiday season.
To make these gift tages, either trace your hand on a piece of colorful paper and cut it out, or press your hand in fingerpaint and then onto a piece of paper and let dry. Next add the name of the person to whom you are giving the gift, your name, and than decorate further with your crayons, markers, glitter, etc. Happy Holidays! Enjoy Crafting!

Wednesday, November 29, 2006

Holiday Handprint Wreath

Today's Craft: Holiday Handprint Wreath
To make this holiday wreath you will need green construction paper, glue, red ribbon and construction paper, and a paper plate. Trace your handprints many times on green construction paper and cut them out. Take the paper plate and cut out the center to create a basic wreath shape. Arrange the handprints in a circle with the fingers pointing outwards on the ring you just created and glue them in place. Take the red ribbon or use red construction paper to make a bow and glue onto the top or bottom of your wreath. Now decorate your wreath more if you wish- paint it, add glitter, or other shapes, wire garland, and more. Enjoy Crafting!

Tuesday, November 28, 2006

Gingerbread Houses

Today's Craft: Gingerbread Houses
Create a giant gingerbread house that would make Hansel & Gretel proud!
To make this craft project you will a large cardboard box, colored construction paper, scissors, glue, tape, cotton balls, and markers or crayons. To begin, take your box and wrap it in brown construction paper. Next take more brown construction paper, roll each piece into a long paper tube, and then stack these paper rolls, securing them together with glue or tape, creating a pyramid shaped roof on top of your box. Now you have a basic gingerbread house shape to decorate. Now take your construction paper and cut out a wide variety of shapes- rectangles, squares, triangles, circles, and more. Glue your shapes onto the house to create windows, a door, candy trimming and decoration, etc. Add cotton balls for further decoration with glue. Let dry. Enjoy Crafting!

Monday, November 27, 2006

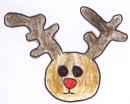
Easy and Adorable Reindeer

Today's Craft: Easy and Adorable Reindeer
Santa must be missing a Reindeer...
To make this craft project you will need brown and red construction paper, a brown paper plate, glue, crayons or markers, and scissors. To begin, cut out reindeer antlers and a red reindeer nose using the templates provided below. Glue the antlers and nose onto your brown paper plate to create an adorable reindeer face. Decorate further with your crayons or markers. Let dry. Enjoy crafting!

Sunday, November 26, 2006

Reindeer Handprint Puppet

Today's Craft: Reindeer Handprint Puppet
Make a great reindeer with a personal touch!
To make this great reindeer craft you will need a small brown paper bag, some brown construction paper,tape or glue, a red circle (cut from red construction paper or just use a red pom pom) and some crayons.First trace both of your hands on the brown construction paper and cut them out. Your handprints willbe your antlers. Create your reindeer's face on the bag's bottom, add the antlers and tail to the back side of the bag and the legs with hooves to the front. Decorate your reindeer further with spots, paper shreds, and crayons. Enjoy Crafting!

Saturday, November 25, 2006

Tiny Snowman Button Ornament

Today's Craft: Tiny Snowman Button Ornament
Transform three white buttons and some felt into a cute ornament.
To make this craft project you will need colored felt, three white round buttons, tacky glue, scissors, and ribbon. To begin cut a strip of felt to assemble your snowman on - square or point the ends of the felt. Poke a hole in the center of one of the ends and thread a piece of ribbon through to create a loop to hang your ornament from later. Next take your three white buttons and glue them in a straight vertical line in the center of your felt strip to make a snowman. Now if you want to decorate your snowman further, cut out a black felt hat, add a face with black marker, etc. Enjoy Crafting!

Friday, November 24, 2006

Christmas Paper Cone Tree

Today's Craft: Christmas Paper Cone Tree
Create a festive Christmas tree from a simple paper cone.
To make this craft project you will need tape, glue, scissors, green construction paper, glitter, colored paper, markers or crayons and a couple of pipecleaners. To begin, take your piece of green construction paper, bend it into a paper cone, tape it so it will hold its form, and then trim the bottom with your scissors so the tree will rest flat. Now you are ready to decorate your tree. Wrap pipecleaners around the cone for tinsel or lights. Add tiny paper ornament, stickers, and glitter with glue to brighten up your tree. Let dry and place someplace special. Merry Christmas. Enjoy Crafting!

Thursday, November 23, 2006

Racing Reindeer Puppet

Today's Craft: Racing Reindeer Puppet
To make this craft project you will need a paper bag, colored construction paper- black, brown, and red-, glue, scissors, and crayons or markers. To begin, using the templates cut out the reindeer face, eyes, antlers, and bright red nose from your colored construction paper. Now you are ready to assemble your reindeer puppet. Take your paper bag and flip it over so the bottom of the bag is facing up. This will be the face of your reindeer. Glue on the face, eyes, antlers and bright red nose. Let the pieces dry and then decorate your reindeer further with crayons and markers. Now you should have a beautiful paper bag puppet! Enjoy Crafting!

Wednesday, November 22, 2006

J is for JOY Christmas Banner

To make a J is for JOY Christmas Banner, you will need colored construction paper, scissors, glue, and crayons or markers. To begin, cut out the letters from whatever color of construction paper you wish. Now choose a background set of papers for your letters and glue them to the papers to create a banner. Let dry and decorate the letters and the banner with your markers of crayons. Merry Christmas! Enjoy Crafting!
More Christmas Crafts & Resources

Tuesday, November 21, 2006

Simple Pompom Christmas Tree

Today's Craft: Simple Pompom Christmas Tree
To make this craft project you will need a bunch of colored pompoms, glue, and some colored construction paper. To begin, select a piece of colored construction paper on which to make your Christmas tree. Next glue pompoms on it in the shape of a Christmas tree- use the picture as a guide. Use green ones for the tree, colored ones for the ornaments, and yellow ones to create a star. Let dry. Enjoy Crafting!

Monday, November 20, 2006

Christmas Elf Paper Bag Puppet


Today's Craft: Christmas Elf Paper Bag Puppet
To make this craft project you will need a paper bag, colored construction paper, scissors, glue or tape, and crayons or markers. To begin, using the craft templates cut out your elf's features, collar, and hat from your colored construction paper. Now flip your paper bag over so the bottom of the bag is facing up- this will become your elf's face. Next glue or tape your elf's features, hat, and collar to the paper bag and add further decoations with your crayons. Let your elf dry and you will have a great puppet. Enjoy Crafting!

Sunday, November 19, 2006

Rolie Polie Turkey

Today's Craft: Rolie Polie Turkey
Make a Rolie Polie Turkey for lots of Thanksgiving fun!
To make this Rolie Polie Turkey you will need colorful construction paper, scissors, glue, and some tape. Take your brown paper and create as 2 paper rolls. Trim the rolls so they are different lengths and then stack them one on top of the other from larger to smaller (securing them in place with tape) to build your turkey's body. Next, using the templates provided, cut out turkey features and many colorful turkey feathers. Glue these onto your turkey's body and let dry. Happy Thanksgiving! Enjoy Crafting!

Saturday, November 18, 2006

Delightful Dangling Dreidel Mobile


Today's Craft: Delightful Dangling Dreidel Mobile
Create a delightful dangling dreidel mobile using a heavy weight blue paper and ribbon.
To make this craft project you will need a couple of sheets of heavier weight blue paper, scissors, glue, a hole puncher, ribbon, crayons or markers, and glitter. To begin, using the templates provided below, cut out a large dreidel frame and four small dreidels from your heavier weight blue paper. Next take your hole puncher and punch four holes across the top of the large dreidel frame and one hole in the top of each of the dreidels. Next decorate your dreidels using your markers or crayons, and glue and glue. Let dry. Next cut out four small lengths of ribbon- attach one end to the top of the small dreidel and the other end to the dreidel frame- use the picture as a guide. Repeat until all four small dreidels are dangling within the larger dreidel. Now cut a long piece of ribbon and attach it to the top of the large dreidel frame so you can hang it up someplace special. Happy Hanukkah! Enjoy Crafting!

Friday, November 17, 2006

Festive Fall Leaf Turkey

Today's Craft: Festive Fall Leaf Turkey
To make this craft project you will need, colored construction paper, a number of colorful fall leaves from outside, scissors, glue, and markers or crayons. To begin cut out a turkey body and features using the template provided below- you do not need to cut out feathers. Glue the turkey body and features to a background piece of paper. Now add colorful fall leaves with glue around your turkey's body to create turkey feathers! Let dry. Happy Thanksgiving! Enjoy Crafting!

Thursday, November 16, 2006

Fall Trees Filled with Gratitude

Today's Craft: Fall Trees Filled with Gratitude
To make this craft project you will need colored construction paper, scissors, glue, and markers or crayons. To begin, cut out a brown tree trunk from your colored construction paper using the templates provided below. Glue it on a colorful background piece of paper. Next cut out a lot of and leaves in different colors. On each leaf write something for which you are grateful and add it to the tree. Decorate further with your markers or crayons if you wish. Happy Thanksgiving! Enjoy Crafting!

Wednesday, November 15, 2006

Native American War Bonnets

Today's Craft: Native American War Bonnets
To make this craft project you will need some heavier weight colored construction paper, scissors, glue, paint, markers, or crayons, and tape. To begin cut out a long headband from your paper, fit it to the size of your head and tape it securely together so it holds its shape. Next cut out a large number of feathers using the templates provided below. Make them 'feathery' looking by cutting a number of diagonal slits around the edges of each. Decorate them using your paint, markers, or crayons. When you are finished attach them to your headband all the way around it. Decorate further if you wish. Enjoy Crafting!

Tuesday, November 14, 2006

Wampum

Today's Craft: Wampum
To make this craft project you will need string, scissors, and different colored soda straws. To begin, take the diffrent colored straws and cut them into one inch pieces. Next cut a long piece of string that will easily fit over your head. Cut several pieces of string this length if you want to make multiple wampum necklaces. Now thread the pieces of straw onto the length of string and when you are finished threading it tie the two ends of the string together and you will have a wonderful wampum necklace.
Native American Crafts & Resources

Monday, November 13, 2006

Thanksgiving Gratitude Turkey

Today's Craft: Thanksgiving Gratitude Turkey
To make this craft project you will need colored construction paper, scissors, glue, and markers or crayons. To begin, cut out a brown turkey body shape and turkey features using the templates below from your colored construction paper. Glue them on a colorful background piece of paper. Next cut out a lot of turkey feathers in different colors. On each feather write something for which you are grateful and add it to the turkey. Decorate further with your markers or crayons if you wish. Happy Thanksgiving! Enjoy Crafting!

Sunday, November 12, 2006

Painted Buffalo Skins

Today's Craft: Painted Buffalo Skins
To make this craft project you will need large brown paper bags (grocery size), scissors, and markers, crayons, or paints. To begin take your grocery bags and cut it open so it is large and flat. With your scissors trim the edges so it has the shape of an animal skin. Next decorate it with your markers, crayons, or paints- you decide. If you want use some of the symbols provided in the template below. Let dry. Enjoy Crafting!

Friday, November 10, 2006

Native American Moccasins

Today's Craft: Native American Moccasins
Make a pair of cool Native American Moccasins.
To make this craft project you will need 2 large pieces of thick brown felt, scissors, thick thread and a needle, colored felt, tacky glue, and fabric markers. To begin, fold a large piece of felt in half. Put your left foot on it about 1/2 inch from the fold and one inch from the bottom of the felt. Now trace around the left side and top of your foot- now add about one inch extra all around the tracing. Leave the right side straight- don't trace the right side of your foot. Now take your scissors and cut out your moccasin. Take your needle and thread and so up the top and left side of the moccasin. Cut a slit shaped like a T down the center of the top - (about 2/3 of the length of the top)- of the moccasin. Now stitch together the heel, make a small cut near the bottom to create a flap to sew it all together. Now decorate your moccasins with colorful pieces of felt and fabric makers. Enjoy Crafting!